Last Updated on April 17, 2023
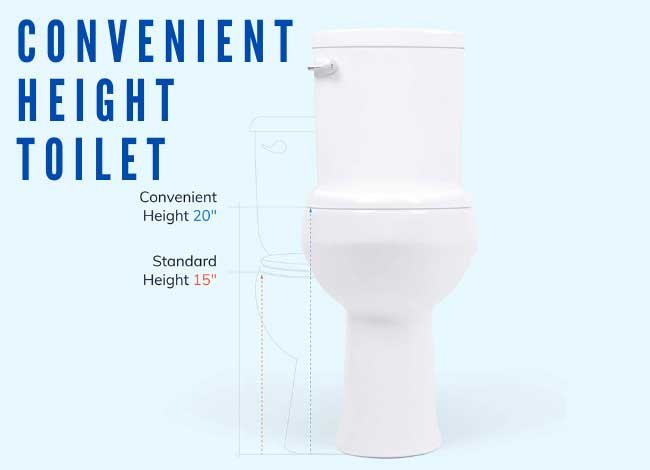
Maintaining the water level is crucial for an effective flushing mechanism. You will experience a poor or weak flush if the water level is too low. The methods that are given in this article must be followed in order to have a splendid flush. Raising the water level can be effective enough to balance the internal parts of the toilet. If you need to install a new valve, ensure that you reassemble every part in the right order to avoid intermittent leaks.
Reasons why the water level in the tank is low:
- Damaged or broken fill tube
- Poor water pressure
- Low-lying Float Ball
- Leakage issue
- Clogged Toilet
- Damaged fill valve
- Cracked toilet bowl or tank
- Inlet Holes Are Clogged
The simplest way to higher the water level is to adjust the fill valve that controls the water that refills the tank. There is a screw attached to the top of the fill valve. Just turn the screw clockwise with a screwdriver to raise the water or float level in the toilet tank.
How to adjust and raise the water level in the toilet tank?
There are many ways of adjusting the water level in the tank. Those strategies are discussed here,
Method-1: Retracting a Fill Valve
The fill volume is the main part of the toilet that is responsible for making the impressive filling of thyme water level in the tank.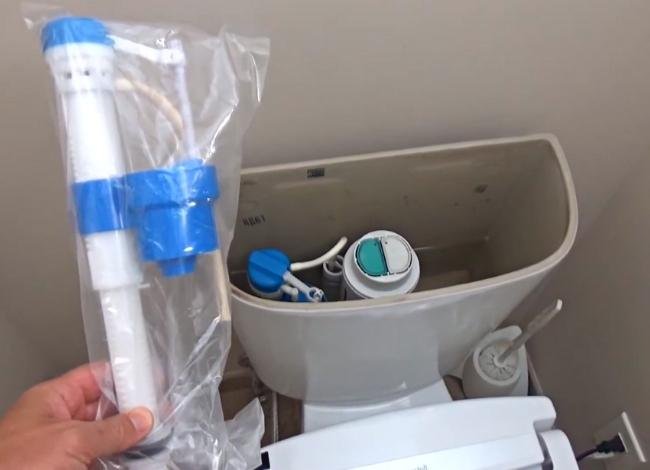
Step-1
Replacing a fill valve involves opening the hole at the base of the tank, making a robust vendor crude adjustment in the system. Inspect and install the new fill valve and flapper with G-Lakner.
Step-2
You need to flush the tank after it is poured with a higher rate of water. The external water valve and the other peripherals must be in a good assumption, so the tank should be in an instance. Then detach the hose from the water supply valve and replace that with a new one. Use the pliers or wrench to lose the main composure of the toilet. A wrench can rip the fill valve out of the system. Discard the old valve.
Step-3
Attach the hose back to the bottom of the valve and tighten the screw of the plastic valve nut right down the whole thing as the main composition of the toilet bottom.
Finally, some tombs in the tank must be controlled and put into tight exposure. After putting the brand new valve in place, turn on the water supply line so that it can be softened, and the fixture is going to be in a central place.
Method-2: Addressing the Ball-and-Arm Float
Raising the water level is another quite impressive method that can be denoted as one of the most challenging processes. There is no such thing as maintaining the water level of the tank. 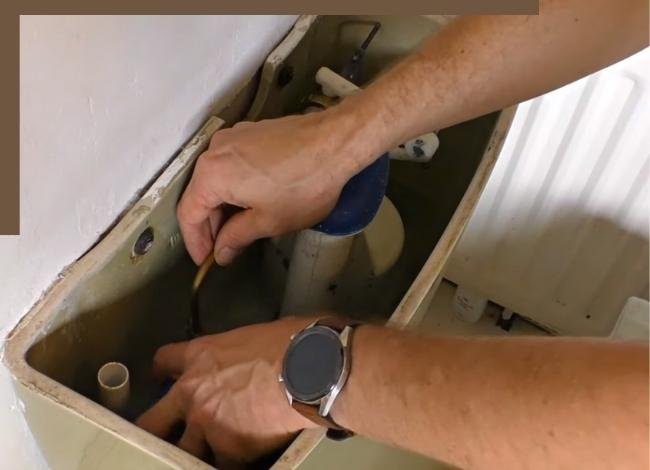
- The Ball-and-Arm Float must be readjusted. First of all, remove the toilet tank’s lid, and then all other procedures will be in progress. Make sure that the lid is to be reserved in a soft place.
- Then you need to stop the water ball valve to ensure no water is running in the toilet. The next big thing could be the dynamism of the water float ball.
- Then check the flapper and the fill valve to make adjustable water flow in the toilet tank. In this section, you need to check the float valve’s height, which could be the toilet’s turning plenty of nifty tanks.
- Always keep in mind that turning the system Clockwise will raise the water level, and counterclockwise will lower it.
- Then check the flow of the water and, of course, the float valve in order to make the water level underneath the surface. The water level should not be too diversified, making the whole chain system blank.
Method-3: Check the leakage in the tank
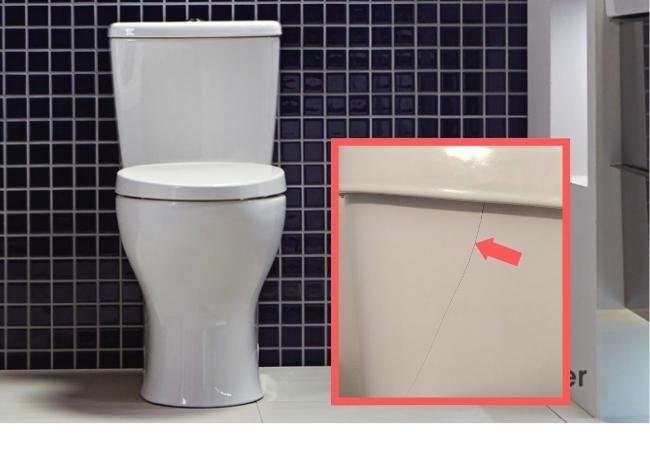
Sometimes the toilet tank tends to be in a state where there is some sort of leakages, and possible outcomes must be taken with solemn importance. The bottom part of the tank is sometimes cracked or in a state where there is a chance of extreme leakage. Find out the certified linkage between the cracked and invertible tank.
Method-4: Adjusting a Cylinder Float
This method is one of the most dominating methods in making the water level up to the mark. The ball-and-arm design is a matter that should be made under control. The fill valve and overflow tube need to be adjusted. These two are the most impressive parts of the toilet.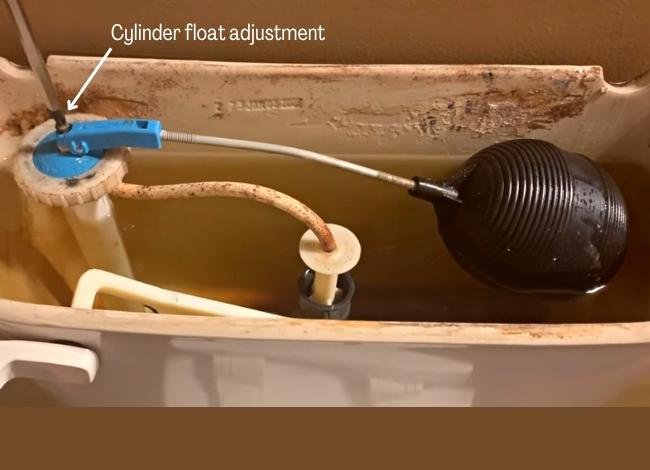
Turn off Water Supply
In this step, the water supply line needs to be shut off so that unnecessary water can not pass into the hook. The impressive counting of the water level should match the utmost lever element in the system. Then check the adjustment stem on the side of the float. Inside the tank, there is a release valve to be used in making the next-level eater sealant in the machismo ramble.
Adjusted the water level
Check for a screwdriver notch if you’re having trouble turning the adjustment stem. Screws secure some adjustment dials. Do not turn the notch more than one full rotation simultaneously. Rise the toilet water level by turning the screwdriver clockwise. Then water level height must be checked so that the intolerable separation can not affect the minimalist nature of the theater level in the tank of the toilets.
Hi, I am Jose S. Franz. Currently, I am working as a professional plumber, and our team offers various plumbing services at an affordable price. After my college education, I completed a vocational certification course in plumbing systems and worked with several construction companies. Since then, I have fixed lots of different toilet models, from older to the latest versions. So I have more than 22 years of experience installing plumbing systems and toilets in both residential and commercial buildings.